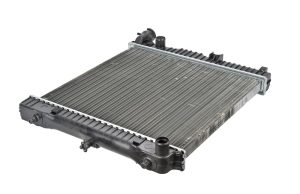
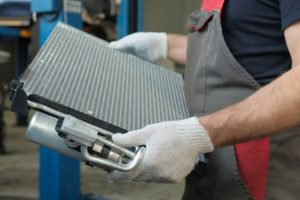
Installing a radiator may seem like a straightforward task, but it’s surprisingly easy to make critical mistakes that can lead to poor performance, coolant leaks, or even engine overheating. Whether you’re a DIY enthusiast or a professional mechanic, understanding these common pitfalls — and how to prevent them — can save you from costly repairs and ensure optimal cooling system performance.
This article explores the most frequent radiator installation errors, why they happen, and the best practices to avoid them.
Using the Wrong Radiator for Your Vehicle

Mistake: Installing a radiator that’s incompatible with the vehicle’s engine size, cooling demands, or mounting points.
Consequences:
-
Inadequate cooling
-
Fitment issues
-
Potential damage to engine or radiator mounts
How to Avoid:
-
Always check your car’s service manual or OEM specifications.
-
Verify hose connection sizes and mounting locations.
-
Choose radiators with proper core dimensions and cooling capacity.
Tip: When in doubt, consult a professional or order from a verified parts dealer like Buy Radiator & Components online to ensure a precise fit.
Not Flushing the Cooling System Before Installation
Mistake: Skipping a proper flush of the old coolant, rust, and debris before installing a new radiator.
Consequences:
-
Contamination of new radiator
-
Corrosion buildup
-
Reduced coolant efficiency
How to Avoid:
-
Use a radiator flush solution to clean the system thoroughly.
-
Run the flush through the system until water runs clear.
-
Replace coolant with a fresh, manufacturer-approved mixture.
Reusing Old or Damaged Hoses and Clamps
Mistake: Retaining old hoses, clamps, or seals during installation to save time or money.
Consequences:
-
Leaks at hose connections
-
Hoses bursting under pressure
-
Clamp failure due to corrosion or fatigue
How to Avoid:
-
Replace all hoses and clamps during radiator installation.
-
Inspect for wear, cracking, and rust.
-
Use high-quality, stainless steel clamps for longevity.
Improper Torque on Mounting Bolts
Mistake: Over-tightening or under-tightening radiator mounting bolts.
Consequences:
-
Cracked radiator tanks or mounts
-
Vibration leading to long-term damage
-
Misalignment causing hose stress
How to Avoid:
-
Follow manufacturer torque specifications.
-
Use a torque wrench for precise tightening.
-
Tighten bolts gradually in a cross pattern.
Installing Without Bleeding Air from the System
Mistake: Not bleeding the air pockets from the coolant system after installation.
Consequences:
-
Airlocks that prevent proper coolant circulation
-
Engine overheating
-
Inaccurate temperature readings
How to Avoid:
-
Use a vacuum fill tool or manual bleeding process.
-
Keep the heater on high during bleeding to open the heater core.
-
Monitor the radiator cap and overflow tank for air bubbles.
Forgetting to Check Thermostat Operation
Mistake: Ignoring the thermostat condition or assuming it’s working during radiator replacement.
Consequences:
-
Coolant does not circulate properly
-
Inconsistent engine temperatures
-
Overheating or cold-running engine
How to Avoid:
-
Test the thermostat in hot water to ensure it opens.
-
Replace the thermostat if it’s old, sticking, or slow to respond.
-
Use a new gasket or sealant when reinstalling.
Poor Coolant Mixture or Type
Mistake: Filling the new radiator with water only or the wrong type of antifreeze.
Consequences:
-
Freezing or boiling of coolant
-
Accelerated corrosion
-
Reduced cooling performance
How to Avoid:
-
Use a 50/50 mix of coolant and distilled water (or premixed coolant).
-
Match the coolant type (OAT, HOAT, IAT) to manufacturer specifications.
Table: Comparison of Radiator Installation Mistakes & Solutions
| Mistake | Effect | Prevention Tip |
|---|---|---|
| Wrong radiator size/type | Overheating, poor fitment | Match OEM specs or VIN |
| No system flush | Clogging, reduced efficiency | Flush coolant before install |
| Reusing old hoses/clamps | Leaks, burst hoses | Replace with new parts |
| Over/under torque on bolts | Cracks or vibration | Use torque wrench with correct settings |
| Not bleeding air | Airlocks, overheating | Bleed system manually or with vacuum tool |
| Ignoring thermostat condition | Coolant stagnation | Inspect and replace if necessary |
| Wrong coolant or mixture | Corrosion, freezing | Use recommended coolant in 50/50 ratio |
Essential Tools for Radiator Installation
Here are a few tools and supplies you should always have for a smooth radiator install:
-
Torque wrench
-
Drain pan
-
Funnel and coolant fill tool
-
Vacuum fill or bleed kit
-
Radiator flush solution
-
Replacement hoses and clamps
-
Gloves and eye protection
Best Practices Checklist

Before completing a radiator installation, double-check the following:
Radiator is compatible and properly mounted
All old coolant is flushed
New hoses, clamps, and thermostat are installed
Proper torque used on all fittings
Coolant filled to recommended level
System is bled and pressure-tested for leaks
Engine is run and monitored for temperature stability
Conclusion
Radiator installation is more than just a bolt-on job — it’s a key process in maintaining your vehicle’s cooling performance and engine health. Avoiding common mistakes like using the wrong radiator, failing to bleed air, or skipping hose replacement can save you time, money, and stress down the road.
Whenever you’re upgrading or replacing cooling components, make sure to choose high-quality parts and follow a methodical process.
For quality components and direct-fit solutions, Buy Radiator & Components online