Table of Contents
- Why You Might Need to Replace Your Car’s Radiator
- Tools and Materials Needed
- Step-by-Step Instructions for Replacing Your Car’s Radiator
- Common Mistakes to Avoid During Radiator Replacement
- When to Seek Professional Help
A well-functioning radiator is critical to your car’s cooling system. If your radiator is damaged or malfunctioning, it can lead to engine overheating, reduced engine performance, and potentially severe engine damage. While replacing a radiator may sound like a complicated task, it’s actually a manageable DIY project with the right tools and instructions. In this step-by-step guide, we will walk you through the entire process of replacing your car’s radiator efficiently.
Why You Might Need to Replace Your Car’s Radiator

Before diving into the replacement process, it’s important to understand when it’s necessary to replace the radiator:
- Leaks: If your radiator is leaking coolant, it could be a sign of a crack or damage in the radiator itself. Sometimes leaks can be repaired, but in many cases, replacing the radiator is the best option.
- Overheating Engine: Persistent engine overheating despite proper coolant levels may indicate a radiator issue, like poor heat dissipation or a clogged core.
- Rust and Corrosion: If your radiator has significant rust or corrosion buildup, it may be inefficient and could fail at any time.
- Coolant Contamination: If your coolant has debris or contaminants, it may clog the radiator, affecting its performance.
Tools and Materials Needed
To replace your car’s radiator, you will need the following tools and materials:
Tools:
- Socket wrench set
- Screwdrivers (flathead and Phillips)
- Pliers
- Drain pan (for collecting coolant)
- Hose clamps (optional)
- Flashlight (for better visibility)
- Funnel (for refilling coolant)
- Torque wrench (for tightening bolts to manufacturer specifications)
Materials:
- Replacement radiator
- Coolant (make sure it’s the correct type for your car)
- Replacement hoses (if necessary)
- New radiator cap (if applicable)
- Anti-seize lubricant (optional for bolts)
Step-by-Step Instructions for Replacing Your Car’s Radiator

Step 1: Prepare the Vehicle
Before beginning the replacement, it’s crucial to prepare the vehicle:
- Park the Car on a Level Surface: Make sure your car is parked on a flat, stable surface. Engage the parking brake to prevent any movement.
- Turn Off the Engine: Ensure the engine is turned off and completely cool before starting the work.
- Disconnect the Battery: Disconnect the negative terminal of the battery to avoid electrical shocks or accidental short circuits while working.
- Drain the Coolant: Place a drain pan underneath the radiator and remove the drain plug or lower radiator hose to drain the coolant. Allow the coolant to fully drain into the pan, and dispose of it properly.
Step 2: Remove the Old Radiator
Now that the coolant is drained and the car is safely prepared, it’s time to remove the old radiator.
- Disconnect the Upper and Lower Radiator Hoses: Use pliers to remove the hose clamps, and then slide off the hoses from the radiator. Keep in mind that some coolant may still spill out when the hoses are removed, so have the drain pan ready.
- Disconnect the Radiator Fan(s): The radiator fan may be attached to the radiator with screws or bolts. Use the appropriate tools to remove any screws or bolts holding the fan in place.
- Disconnect the Transmission Cooler Lines (if applicable): Some radiators have transmission cooler lines that need to be disconnected. Use pliers to remove the hose clamps, and gently pull the lines off the radiator.
- Remove the Radiator Mounting Bolts: Look for the bolts securing the radiator to the car’s frame or support. Use a socket wrench to remove these bolts.
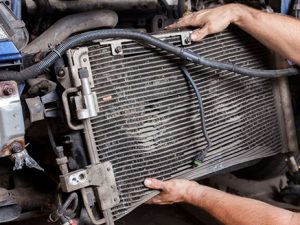
- Carefully Remove the Radiator: Once all the hoses, lines, and bolts are removed, carefully lift the radiator out of place. Radiators can be heavy, so use both hands or ask for assistance if needed.
Step 3: Install the New Radiator
Now that the old radiator is out of the way, it’s time to install the new one.
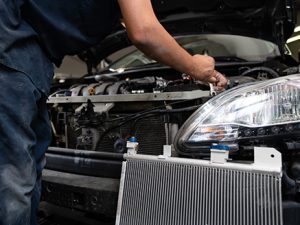
- Position the New Radiator: Place the new radiator in the mounting location and secure it with the bolts you previously removed. Ensure that the radiator is sitting properly and is aligned with the car’s frame.
- Reconnect the Transmission Cooler Lines (if applicable): If your car has transmission cooler lines, reconnect them to the new radiator and secure them with the hose clamps.
- Reconnect the Upper and Lower Radiator Hoses: Slide the radiator hoses onto the new radiator and tighten the hose clamps securely to prevent any leaks.
- Reattach the Radiator Fan: Position the radiator fan(s) back onto the radiator and secure it with the screws or bolts.
- Install the Radiator Cap: If you’re replacing the radiator cap, attach the new one to the top of the radiator.
Step 4: Refill the Cooling System
- Check the Coolant Reservoir: Ensure that the coolant reservoir is empty before refilling the system. If necessary, clean it out before proceeding.
- Refill with Coolant: Using a funnel, carefully fill the radiator with the appropriate coolant. Be sure to use the manufacturer-recommended type of coolant, as mixing coolants can cause poor performance.
- Check for Leaks: Once the radiator is filled with coolant, inspect the area around the radiator, hoses, and connections for any visible leaks. Tighten any connections if needed.
- Bleed the Cooling System: To remove any air from the system, start the car and allow the engine to run for several minutes. Keep an eye on the temperature gauge to ensure that the engine doesn’t overheat. You may need to top off the coolant as air bubbles escape from the system.
Step 5: Final Checks
- Reconnect the Battery: Reconnect the negative terminal of the battery.
- Test Drive the Car: Take the car for a short drive, paying attention to the engine temperature. If the engine remains at a stable temperature without overheating, your replacement is successful.
- Monitor Coolant Levels: After the test drive, check the coolant levels again and add more coolant if necessary.
Common Mistakes to Avoid During Radiator Replacement
Replacing a radiator can be a straightforward process, but there are some common mistakes to avoid:
- Not Draining the Coolant Properly: Always drain the coolant before removing the radiator to avoid spills and messes.
- Incorrectly Tightening Hoses: If you don’t secure the hoses properly, you could end up with coolant leaks.
- Forgetting to Bleed the Cooling System: If you skip bleeding the cooling system, air bubbles can cause overheating and poor engine performance.
- Using the Wrong Coolant: Always use the manufacturer-recommended coolant. Using the wrong type can lead to engine overheating and damage.
When to Seek Professional Help
While replacing the radiator is often a manageable DIY project, there are times when it’s best to seek professional assistance:
- If the Radiator Core is Clogged: Sometimes, a radiator core can become clogged, reducing its effectiveness. If your radiator shows signs of clogging, a professional may be needed for cleaning or replacement.
- If You’re Not Comfortable with the Process: If you’re not familiar with car repairs or lack the necessary tools, it’s best to have a professional replace the radiator.
- If There Are Other Cooling System Issues: If you suspect problems with your water pump, thermostat, or other components, a mechanic may be able to address the issue more efficiently.
Conclusion
Replacing your car’s radiator doesn’t have to be a daunting task. By following this guide and taking the necessary precautions, you can ensure that the replacement process goes smoothly. Remember to always use the right tools, take your time, and double-check your work to avoid mistakes.
If you’re ready to replace your car’s radiator or need replacement components, Buy car radiator components online for high-quality parts and reliable service.