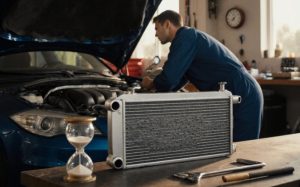
A car’s radiator plays a critical role in maintaining optimal engine temperature, preventing overheating, and ensuring overall vehicle performance. When small leaks or cracks appear, many drivers immediately assume that a costly replacement is inevitable. However, with the right tools, materials, and safety precautions, you can often repair minor radiator issues yourself — saving both time and money.
This guide walks you through DIY radiator repair tips, helping you identify the problem, use the correct materials, and know when professional intervention is necessary.
Understanding the Radiator’s Role and Common Damage Types
Before starting repairs, it’s essential to understand how your radiator functions. The radiator is part of the cooling system that dissipates heat from the engine coolant as air flows through its fins. When damaged, this process is interrupted, leading to potential overheating.
Common causes of radiator damage include:
-
Corrosion due to old coolant or contaminated water
-
Road debris striking the radiator fins or tubes
-
Pressure buildup from a faulty cap or thermostat
-
Aging plastic end tanks or hoses
Types of damage you can fix at home:
| Type of Issue | Typical Cause | Repair Feasibility |
|---|---|---|
| Small pinhole leak in core | Corrosion or stone impact | Can be sealed with epoxy |
| Crack in plastic tank | Thermal stress | Can be patched temporarily |
| Loose or leaking hose connection | Worn clamp or seal | Easily fixed with replacement |
| Minor fin bending | Road debris | Can be gently straightened |
Tools and Materials You’ll Need
Before starting the repair, prepare all the necessary tools and materials to ensure a smooth process.
Essential Tools and Supplies:
-
Protective gloves and safety glasses
-
Screwdrivers and wrenches
-
Radiator leak repair epoxy or sealant
-
Sandpaper (medium grit)
-
Drain pan for coolant
-
Coolant and distilled water for refill
-
Hose clamps (optional replacement)
-
Pressure tester (recommended)
Optional (for more advanced repairs):
-
Soldering iron or torch (for metal radiators)
-
Replacement hose or plastic tank kit
-
Cooling system flush liquid
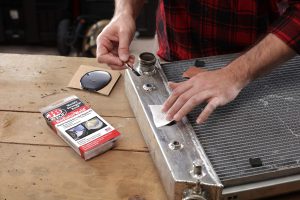
Step-by-Step: Fixing Small Leaks
Step 1: Cool the Engine and Drain the System
Never attempt radiator repair when the engine is hot. Let it cool completely. Place a drain pan under the radiator and open the drain plug to remove the coolant. Dispose of old coolant safely according to local regulations.
Step 2: Locate the Leak
Fill the radiator partially with water or use a cooling system pressure tester to find the exact source of the leak. Look for wet or discolored areas. If needed, run the engine briefly to detect where coolant escapes.
Step 3: Clean and Prepare the Area
Use sandpaper to remove rust, dirt, and old paint around the leak. The surface must be clean and dry before applying epoxy or sealant.
Step 4: Apply the Epoxy or Sealant
Mix the radiator epoxy as per the manufacturer’s instructions. Apply it evenly over the damaged area, covering at least 1–2 cm around the leak. Allow it to cure fully — typically for several hours.
Tip: For plastic tanks, a special plastic welding kit or a two-part epoxy designed for high temperatures yields better results.
Step 5: Refill and Test
Once the sealant has cured, refill the radiator with a 50/50 mixture of coolant and distilled water. Start the engine and let it reach operating temperature. Check for any new leaks and monitor the temperature gauge to ensure proper cooling.
Safety Tips During DIY Radiator Repairs
While radiator repair is manageable for most car owners, safety should never be overlooked.
Always remember:
-
Never open the radiator cap when the engine is hot — pressure buildup can cause burns.
-
Wear gloves and goggles when handling coolant or epoxy.
-
Keep coolant away from pets and children — it is toxic even in small amounts.
-
Work in a well-ventilated area.
Safety Checklist:
| Task | Why It’s Important |
|---|---|
| Wait for engine to cool | Prevent burns |
| Wear safety gear | Protect from chemicals |
| Dispose coolant properly | Environmental safety |
| Test before long drives | Prevent future damage |
When to Replace Instead of Repair
Temporary repairs can extend radiator life, but they aren’t a permanent fix for all damage. It’s crucial to know when replacement is the safer and more reliable option.
Replace the radiator if you notice:
-
Large or multiple cracks in the plastic tank
-
Persistent leaks even after sealing
-
Severe corrosion on fins or tubes
-
Coolant contamination (rusty or oily coolant)
In such cases, replacing the entire unit ensures reliability and prevents engine overheating.
If you’re ready to replace a damaged radiator or component, you can easily Buy Radiator & Components online — including radiators, hoses, caps, and fittings from trusted brands.
Preventive Maintenance Tips
To minimize future radiator problems, adopt simple maintenance practices:
Regular Maintenance Checklist:
-
Check coolant level every 2–3 weeks.
-
Flush and replace coolant every 2 years (or as per manufacturer’s schedule).
-
Inspect radiator hoses for cracks and soft spots.
-
Keep the front grille clean to maintain airflow.
-
Use only distilled water with coolant to prevent mineral buildup.
Recommended Coolant Ratios by Climate:
| Climate Type | Coolant/Water Ratio | Notes |
|---|---|---|
| Temperate (mild winters) | 50/50 | Balanced cooling and antifreeze protection |
| Hot climate | 40/60 | More water improves heat dissipation |
| Cold climate | 60/40 | Higher coolant ratio prevents freezing |
Final Thoughts
DIY radiator repair is a practical solution for small leaks or cracks, offering a cost-effective way to maintain your vehicle’s cooling system. However, understanding your limits is essential — complex or recurring leaks often signal deeper issues requiring professional inspection.
By combining basic mechanical know-how with proper safety measures, you can keep your radiator functioning efficiently and prolong your engine’s life. And when replacement becomes necessary, you can conveniently Buy Radiator & Components online for a high-quality, long-lasting solution.