When your vehicle’s cooling system is working inefficiently, one often overlooked cause is trapped air in the radiator or coolant circuit. Properly bleeding air from the cooling system ensures optimum heat exchange, prevents overheating, and avoids engine damage. In this article we’ll guide you through the process step-by-step, highlight tools and tips, and provide a handy reference table for key checkpoints.
Why Bleeding the Cooling System Matters
-
Air pockets reduce coolant flow, which means less heat removal from the engine.
-
Air in the system can cause hot spots, local boiling, or corrosion.
-
When the thermostat opens, trapped air may prevent the cooling system from fully “cycling”, leading to higher temperatures.
-
A properly bled system prolongs the lifetime of components like the radiator, hoses, water pump and thermostat.
-
If you’ve recently drained, replaced coolant, changed the radiator or removed a hose, then air is likely present and must be removed.
Tools & Materials You’ll Need
-
Coolant of the correct type for your vehicle.
-
Bleed valve / screw (if the vehicle is equipped) or radiator cap access.
-
A funnel and a clean rag.
-
A gloves & eye protection – coolant can be hot and toxic.
-
A hand-held vacuum or pressure bleeding kit (optional but helpful).
-
References to the system layout: radiator, expansion tank, hoses, heater core.
Step-by-Step Procedure
-
Park the vehicle on a level surface, engine cold, parking brake engaged.
-
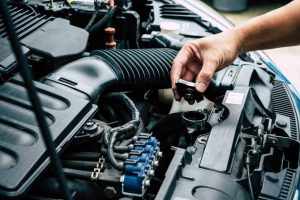
Remove the radiator cap or open the expansion tank. Some vehicles have a separate bleed screw located on a high point of the cooling system (e.g., near the thermostat housing or heater hose).
-
If fitted, open the bleed screw a half-turn (or as manufacturer indicates).
-
Slowly pour coolant into the radiator or expansion tank via a funnel, until the level rises and starts to drop only slowly.
-
Start the engine and turn on the heater to maximum. This encourages coolant flow through the heater core, aiding air removal.
-
Let the engine run until fans (if equipped) turn on and stable operating temperature is reached. Watch for continual bubbling at the bleed screw or radiator filler neck — this indicates trapped air being forced out.
-
Watch coolant level: as air bleeds out, the level may drop. Top up coolant as required.
-
Once bubbling stops and the level remains stable, tighten the bleed screw, reinstall the radiator cap and monitor system pressure (if you have a gauge) or check for leaks.
-
After shutting off, let the engine cool and re-check the coolant level. Adjust if necessary.
-
Finally, take a short drive under light load, park, let the engine cool and re-inspect the coolant level and radiator cap area for signs of leakage or air ingress.
When to Bleed the System
| Condition | Action Needed? | Notes |
|---|---|---|
| Coolant recently changed, system drained | Yes | Full system refill introduces air. |
| Radiator or hoses replaced | Yes | Increased exposure to air. |
| Engine running hotter than normal or heater blowing cool air | Very likely | Might indicate airlock. |
| Persistent bubbles in expansion tank while engine hot | Yes | Clear sign of air being pushed out. |
| No recent work done, normal temps & heater blowing hot | Possibly | Check only if symptoms appear. |
Common Mistakes & How to Avoid Them
-
Skipping the heater circuit: If you neglect to turn the heater on, air trapped in the heater core may remain.
-
Refilling too quickly: This may cause foaming; slow fill gives time for air to escape.
-
Running the engine too quickly: Allow the system to warm gently; avoid revving high immediately.
-
Not tightening bleed screws/caps properly: This may allow air to re-enter or coolant to leak.
-
Using incorrect coolant: The wrong type might result in corrosion or blockages that trap air.
-
Ignoring system leaks: Leaks let air in; bleeding won’t fix the root cause.
Tips for Better Results
-
Always use manufacturer-specified coolant (ethylene glycol/propylene glycol mix) and mix ratio.
-
Consider using a pressure tester or vacuum filler kit — these tools help remove air more thoroughly.
-
If your vehicle has an electronic bleed pump or self-bleeding radiator, follow the specific service manual instructions.
-
After initial bleeding, monitor coolant level over the next few days; topping-up may be required once additional air escapes.
Quick Reference Checklist

-
Engine cooled and parked level.
-
Radiator cap or expansion tank opened.
-
Bleed screw located and opened.
-
System slowly refilled until level stable.
-
Heater turned on to max.
-
Engine run until fan cycles and stable temp.
-
Bubbling stopped, bleed screw closed.
-
Radiator cap replaced & no visible leaks.
-
After cool-down, coolant level re-checked.
-
Short test drive and final inspection.
Final Thoughts
Bleeding the cooling system is a vital but often neglected maintenance task. It doesn’t just benefit the radiator — it preserves the engine’s reliability. By following the steps, paying attention to the details, and using the right tools and coolant, you’ll ensure the system is free of air, performing as intended, and able to keep your vehicle’s engine operating at the optimum temperature.
If you need replacement parts or wish to inspect available components for your system, you can visit this link: Buy Radiator & Components online
With proper bleeding, you’ll minimize risk of overheating, reduce maintenance costs and boost the longevity of your cooling system.